
There is a general misrepresentation of solar energy in Nigeria.
Every other market day we hear solar na scam yet there is a growing community of Nigerians with solar installations who would never go back to generators or the national grid. The technology is not the problem, so what is?
I will attempt to break down the important things you need to know to set up a solar-inverter system for your home or business.
This is not a technical post, the goal is to help you understand enough to know where to start or ask the right questions. That way you make fewer mistakes and get the best value for your money.
I encourage you to spare some time to read this post to the end and if you can spare some more time, check out the extra resources.
A quick caveat: I am not an installer but an enthusiast so may not use the most accurate technical terms to describe certain things as it’s a beginner post. Please do your own research (DYOR) or consult a professional before making any decisions.
Why go solar?
There’s this peace of mind that comes with having a solar system at home.
Less noise, less generator-related stress, plus cheaper electricity down the line. Band A is not cheap, is often unreliable while other bands are worse and may lose their subsidies anytime.
Lifestyle improvement is real too. You can plan and prepare meals days ahead because your freezer never goes off. You can work from home, attend that virtual interview or have a nice Sunday evening with the family without one eye on PHCN.
Even your appliances will be happy because the inverter supplies cleaner energy than what often comes through the grid. The result? appliances develop less faults and last longer.
Imagine a shop that sells cold water and drinks or a phone charging business. Steady electricity means more business, less money spent towards generators.
The initial costs may be high, and that’s understandable but you can always start small and scale up with time. If you have the capital, a solar system is one of the better investments you can make for your home or business.
How does solar energy work?
In a nutshell, energy is harvested by solar panels in the form of direct current or DC, converted by an inverter to alternating current or AC, which powers most home appliances. Excess energy harvested during the day is stored in batteries by solar charge controllers, for use at nights or on cloudy days.
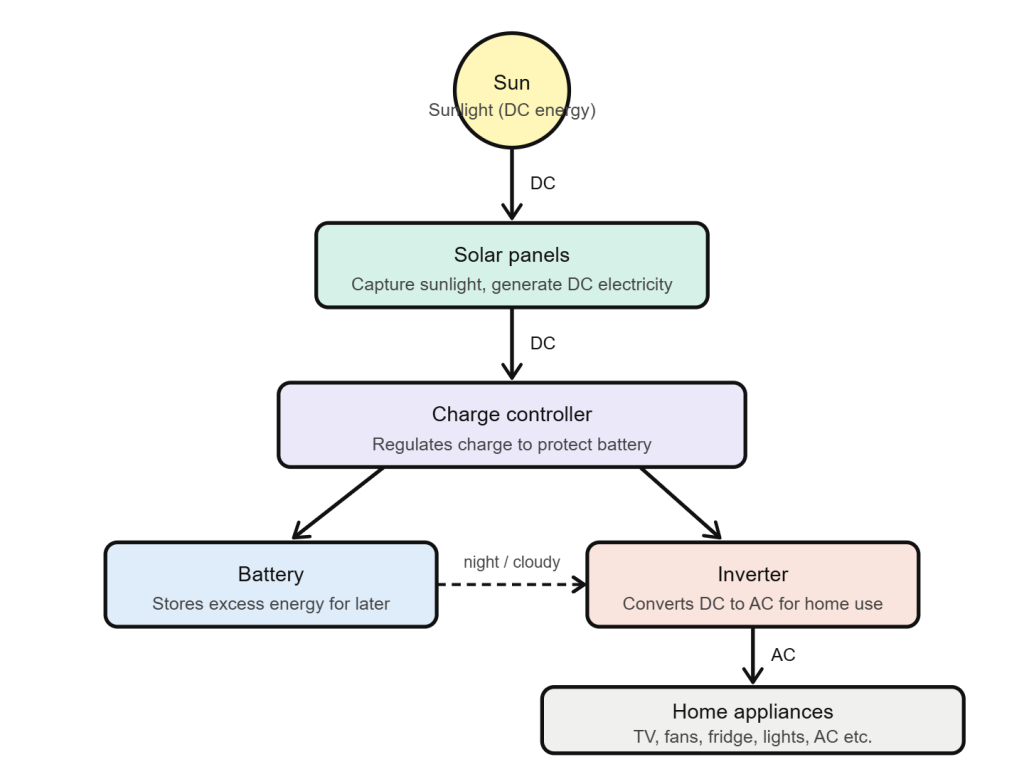
There’s also the option of charging your batteries using grid or generators but this is not the scope of this post. Besides, if it can be avoided, it’s better to charge via panels only.
Where do I start from?
Before thinking of installing your solar-inverter system, here are some things to consider:
- Space for solar panels
If you own your home you should ensure there’s viable roof or ground space for panels that maximises their output. More on this in the solar panels section.
For tenants or those in gated communities, first confirm whether solar panels are allowed, and If not, discuss how to make it work or explore alternative mounting options.
I’ve put this first because it is often overlooked to devastating consequences.
- Solar goal
Your solar goal is what you plan to achieve with your installation. Do you want to be off-grid like Aso Rock or supplement Band C sprinkled with generator use? this will guide your other decisions like what components to buy and budget (hint: cost is directly proportional to how much energy you want to generate and use)
- Finances
Solar systems are not cheap so you have to budget properly. Your current earnings may just be enough for a 1kWh solar generator and that’s fine. You can upgrade your set-up with time and as the budget and lifestyle improves.
- Scalable system
As much as possible, build your system in such a way that it’s easy to scale if you plan to in the near future.
- Load assessment and system sizing
You will have to know every single appliance you want to use and how much you want to use them. This information will help you size your entire system, knowing what specs of components you need to achieve your goal.
With that in mind, let’s look at load assessment.
Load Assessment
Improper load assessment is one of the key contributors to ‘solar na scam’ stories. It’s akin to buying a small generator then expecting it to power your water heater because the fuel tank is full; yet, this is exactly the mistake many people make when installing solar.
A load assessment is simply noting the power consumption of all your appliances and how long you use them, while including a buffer for any future additions.
A basic load assessment looks like this:
- List all appliances you use
- Note the power rating of each appliance by checking their label/specs or use a watt meter). E.g 50″ TV – 100w, Fridge 120w etc
- Multiply each appliance’s wattage by the number of hours you plan to use per day. E.g TV = 100w x 10hrs = 1000Wh.
- Do this for all appliances and add them together.
The sum of all these gives your daily load consumption in watt-hours (Wh). 1,000Wh gives 1kWh.
System sizing goes further as from the daily load result, it calculates the number and/or specs of the other key components like inverter, batteries and solar panels.
Your installer can perform this load assessment and properly size your system, ideally with a report and recommendation or take the do-it-yourself (DIY) approach.
Thankfully, there are online guides, calculators and AI tools you can use. In any case, take these results as a guide not gospel. If you’re interested, I recently vibe coded a solar system size calculator which will be in the additional resources section.
See the additional resources section for other helpful videos and blog posts.
What components do I need for my installation?
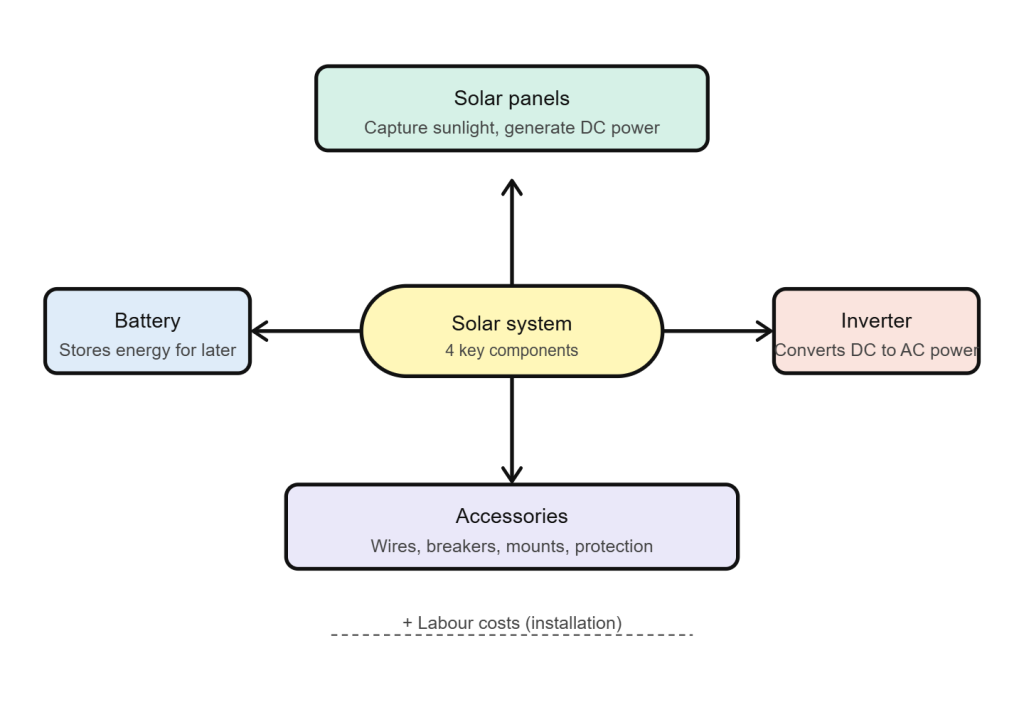
I like to group these components into four:
- Battery
- Solar panels
- Inverter (and solar charge controller)
- Accessories.
Battery
Your battery is like a powerbank where excess energy from the solar panels is stored. Four things to note when looking for a battery:
- Battery type/chemistry – Lead Acid, Gel, Lithium Iron Phosphate
- System voltage – 12v, 24v and 48v
- Battery size in amp-hours (Ah) (100ah, 165ah, 200ah, 340ah etc)
- Battery capacity in kWh, which is product of the system voltage and size (3.2,kWh, 5kWh, 10kWh etc)
What’s system voltage and battery capacity?
System voltage is a key consideration of any solar system as the higher the system voltage, the more efficiently it handles larger loads. 12v, 24v and 48v are popular voltage options for residential solar setups.
It is important because your battery and inverter voltages must match.
Battery capacity is how much energy is stored in your battery, measured in kWh. One kWh is equal to 1 unit of electricity as sold by your DISCO (EKEDC, BEDC etc). 1kWh simply means your battery can power a 1000W load for 1hr, or a 500W load for 2 hours as long as the total energy used over time does not exceed 1kWh.
Battery Type/Chemistry
The popular battery options in Nigeria are tubular (lead acid), gel and lithium Iron Phosphate (LiFePO4) which we’ll refer to us ‘lithium’ going forward.
Tubular and gel are very popular among Nigerian users possibly due to perceived lower price or because it’s been around for longer.
But they’re not very efficient.
Let’s consider two phones. The first can only be safely discharged to 50% per cycle as going lower kills the battery faster. Then consider another phone that can be discharged to 80-90% of its battery per cycle and lasts for more years.
Which would you go for?
That second phone is Lithium. With lithium batteries, you have a depth of discharge ranging from 80%-95%, charge cycles of 3,000-8,000+, and a lifespan of 10+ years compared to 2-3 year lifespan and lower cycle counts for tubular and gel.
What makes this an even easier decision is that the cost gap between tubular/gel and lithium batteries has shrunk considerably in recent times it’s almost negligible. Lithium batteries are strongly recommended so we’ll focus on only them going forward.
How do I know original lithium batteries?
Lithium battery packs are made of smaller battery cells connected in a casing with internal wiring and a battery management system (BMS). These cells are graded A, B, C etc where A is the highest quality.
As a beginner, your best starting point is YouTube search. Search for capacity tests of the specific battery brand and size and cross check with other sources. A more technical approach will be to open the battery packs and check cells and build quality.
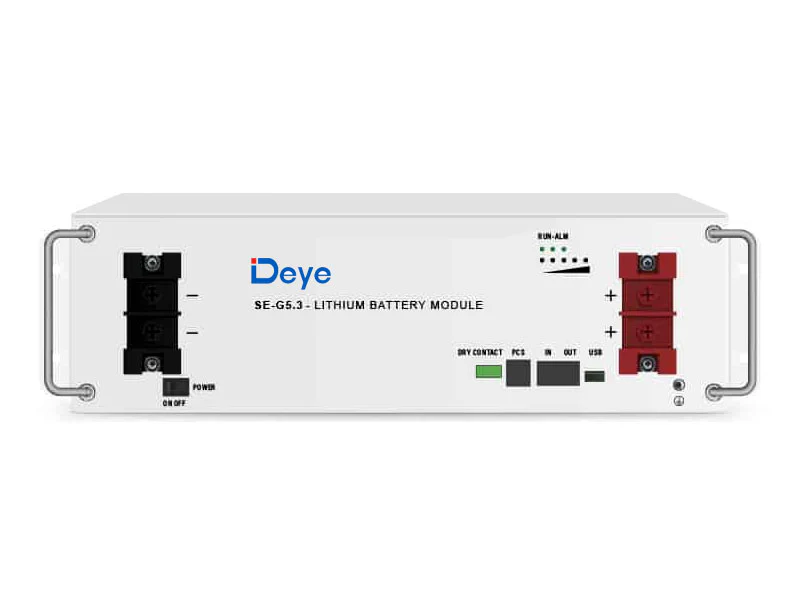
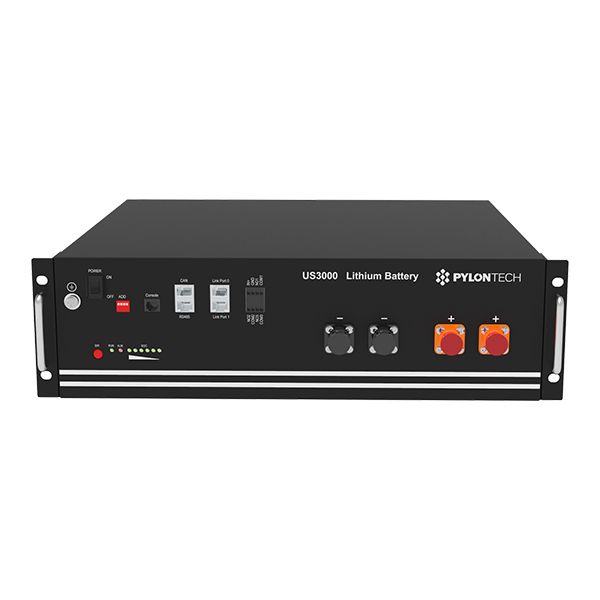
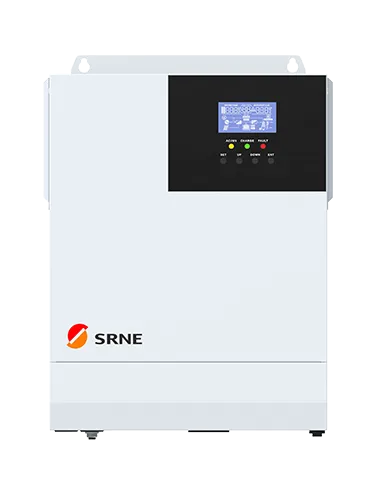
Recommendations: Deye, Pylontech, Deriy, SRNE, Valtech etc (I have no relations to these businesses so please do your own research). Pylontech and Deye are available at Fouani.
How much battery capacity do I need?
Your solar goal should guide on how much backup you need and what appliances you plan to run on the battery. One person may want two days backup power while another only needs for a few hours.
A full days’ backup power is generally recommended for residential setups.
Here’s how to calculate it:
If your load assessment gives a daily load consumption of 3kWh, that is the minimum battery amount you need in a day. But since lithium batteries have a safe discharge of 80-90%, you need a battery that 80% of its use will equal your daily consumption of 3kWh.
To get this you divide 3kWh by 80% or 0.8:
3kWh ÷ 0.8 = 3.75kWh battery.
This is the minimum battery size to safely cover one day of use. For two days backup, multiply by two.
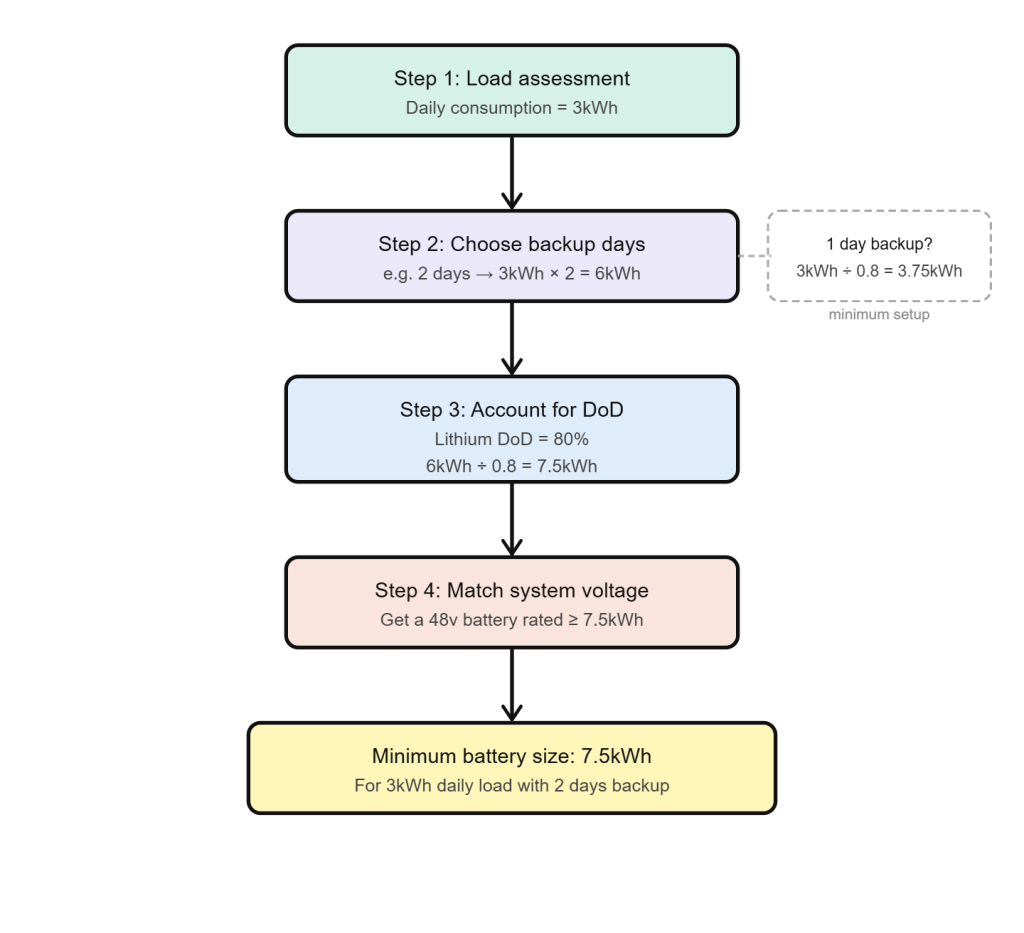
When buying, ensure the battery matches your system voltage. A 48v inverter requires a 48v battery. While it is possible to series connect two 24v batteries to get 48v, it is generally better to keep things simple and buy the correct voltage from the start.
Solar panels
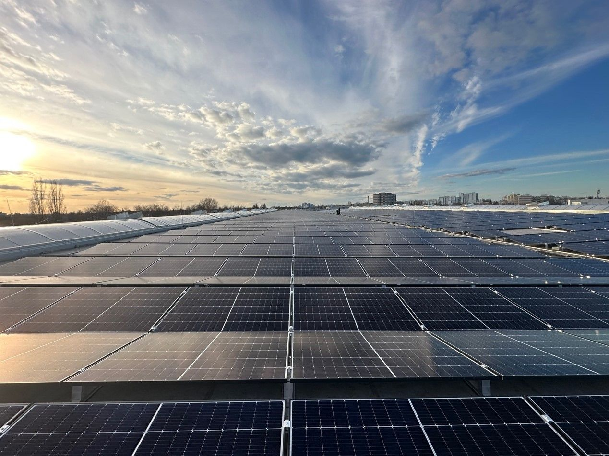
Solar panels are rated in watts and the two popular types are monofacial and bifacial of which any can serve for your project.
Higher rated panels (500w and above) are recommended as they produce more electricity per square meter of roof space, require fewer mounting points, and reduce installation costs overall.
There are a lot of fake panels in the open market sporting stickers of original brands so be careful when buying.
When buying, stick to authentic Tier 1 solar panels only.
Tier 1 panels globally include: Jinko Solar, LONGi, Trina Solar, JA Solar, Canadian Solar etc. Here is a longer list of tier 1 solar panels as at Q4 2025. Some of these panels have official distributors in Nigeria such as Fouani, Solartech, Sygnite, Prosunenergy, Gennex technologies etc.
How do I identify original solar panels?
Verify the authenticity of any panels by scanning its barcode or searching its unique serial number on the company’s website. Here are some panel verification sites.
- Jinko Solar https://cs.jinkosolar.com/app/index.html#/customer-complaint/authenticity
- Longi Solar – https://www.longi.com/en/modules-authenticity/
- JA Solar – https://product.jasolar.com/en.html
- Trina Solar – https://customerservice.trinasolar.com/moduleQuery.html
A physical inspection also helps. Check the build quality, look for signs of previous use, and examine the stickers. If you’re more technical, use a multimeter to verify the panel’s voltage output against the spec sheet.
Calculating number of panels needed
You need enough panels to fully charge your batteries within peak sun hours while also carrying your day time load.
The key factors that determine number of panels are:
- Daily load: from your load assessment.
- Battery capacity: capacity of your lithium battery.
- Power factor: A number that accounts for losses in converting from DC to AC.
- Peak sun hours: the window each day when solar harvest is highest. For Nigeria, it ranges between 3-5hours but slightly higher in the North.
- Panel watt rating – panels are rated in watts e.g. 500w, 590w, 625w etc
- Panel output efficiency – Panel output depends on the quality of the panels. Even tier 1 panels typically perform about 70-90% of their stated capacity on average.
The last part is why tier 1 panels matter. A substandard panel operating below 50% efficiency is quietly undeserving your system and may go unnoticed leaving money and energy on the table.
Quick solar panel sizing guide adapted from offgridsolarsystem.ca
If your daily energy usage is 2–4 kWh/day, you’ll typically need a solar array of 600–1,000W—roughly 1–2 panels rated 500W+.
For users consuming 5–8 kWh/day, consider a solar array in the range of 1,500–2,400W (approx. 3–6 panels). 500W+
If your daily usage is 8–12 kWh/day, you’ll likely require 2,800–4,000W of solar capacity—around 6–10 panels rated 500W+
Improving solar panel production
Even tier 1 panels can underperform under wrong conditions. Here are ways to optimize your solar panel production:
- Avoid shading: Placing solar panels in shaded areas like a roof beside a high-rise building, close to a tree or any place with partial obstruction directly reduces output. Even partial shading in one panel can affect performance of the whole array.
- Don’t place panels directly on the roof: Heat is bad for solar panels and placing directly on the roof amplifies this. Proper mounting accessories hold panels above the roof, allowing air to flow underneath for cooling as well as secure against strong winds.
- Avoid “cut and join” wires: Splicing and rejoining cables introduces resistance, reduces efficiency and is a fire risk.
- Face panels true south with a 4-18° tilt: Facing true (not magnetic) South ensures the longest average sun exposure throughout the day. This may be reconsidered if south-facing space is limited or shaded. A panel tilt of 4-18° is recommended.
- Use correctly sized solar cables: Undersized or cheap cables wires reduce efficiency and are a fire hazard. When in doubt, go with a thicker gauge, it costs a little more but protects your system.
- Match panel connections to your inverter’s input range: Inverters have a recommended voltage and current range for solar input. Ensure panels are connected in series or parallel to meet this range. Your installer should handle this but DYOR nonetheless if you’re buying components yourself.
Inverter and Solar Charge Controller
A solar charge controller (CC) manages power that comes from solar panels to charge batteries. It prevents overcharging and over-discharging, increasing the lifespan of the batteries. While it is sold standalone, newer inverters now have in-built CCs.
An inverter is the brain of the whole operation. Apart from converting DC to AC, inverters help with monitoring your entire system as well as manage power flow between solar panels, batteries, grid and generator.
Inverters come in different classifications, which can be overwhelming at first. For now, the classifications we’re more concerned with are:
- Output waveform: Pure sine wave or modified sine wave. Pure sine wave is what you want as it produces cleaner power and is compatible with all home appliances.
- Operating mode: Grid-tied, off-grid, or hybrid.
For most residential setups, a pure sine wave, off-grid inverter, preferably one with a built-in charge controller is what you need.
Inverter Sizes
Like other components, your daily load calculation is the starting point for determining the right inverter size. The other key factor is whether you plan to run surge appliances.
Surge appliances are those heavy load appliances that draw significantly more power at first, up to at least twice their wattage, before normalizing. Common examples are heaters, fridges, ACs and water pumps.
Think of your inverter like a generator, you already know a 1.5kVA gen cannot suddenly carry all your ACs, water pump and heater. The same applies to a solar inverter and yet I’ve heard cases of people installing a small system and decide to “test if the AC will work”
Don’t be that person.
Choose the right inverter size for your load or reduce appliances that will run on the inverter.
For most small residential homes, inverters below 10kW should suffice. Where more power is needed, higher rated options exist or multiple units can be connected in parallel to achieve a greater combined capacity, provided the inverter supports this functionality.
Quick inverter sizing guide from offgridsolarsystem.ca
For off-grid systems, inverter size should match your peak load and system voltage. As a general rule: use a 12V system for inverters up to 1,000W, a 24V system for 1,000–2,000W, and a 48V system for 2,000–4,000W+.
Inverter buying guide
For simplicity, stick to only inverters with in-built charge controllers. You may not need a dedicated charge controller except it’s a big project with more panels than the inverter’s built-in charge controller can handle.
Single Phase, 3-phase and other features
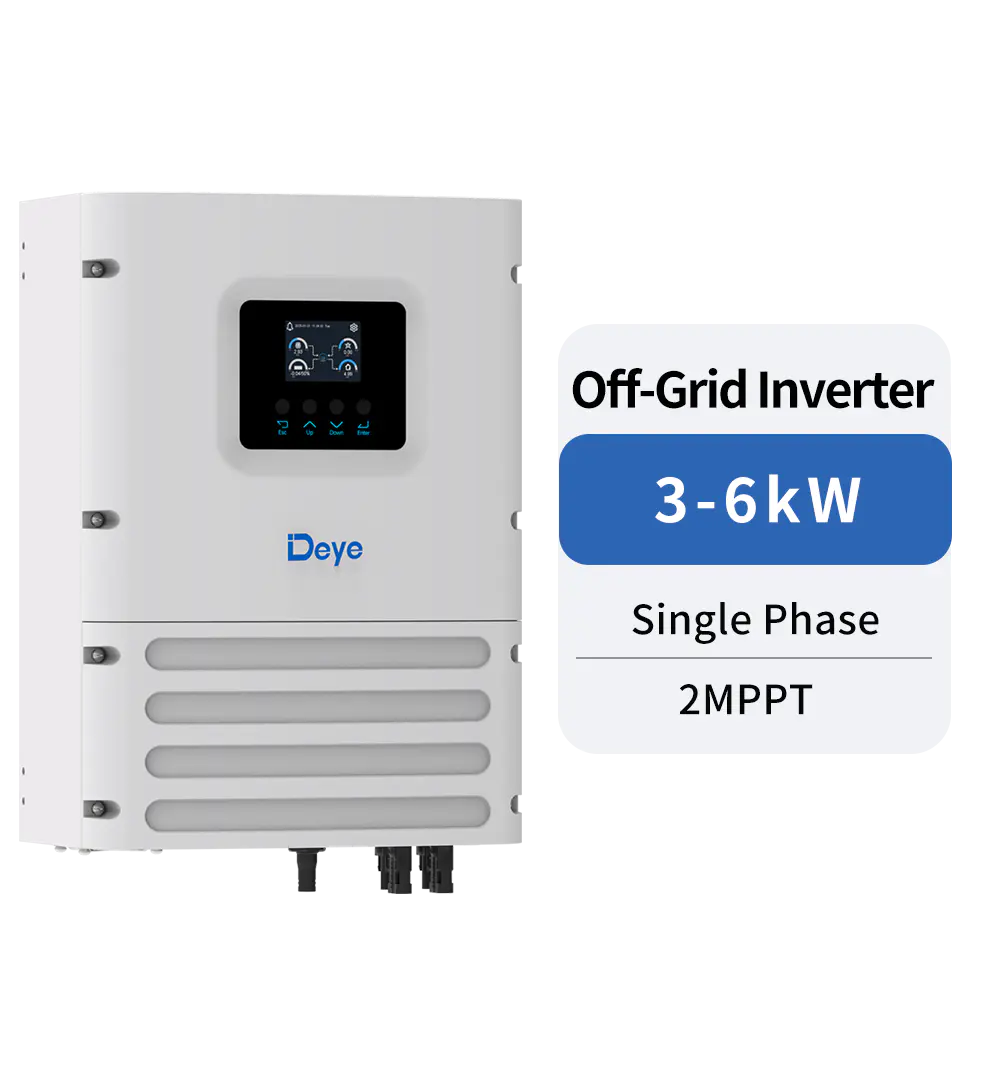
At online or physical stores, you will see various inverter options and features even from the same maker. For most residences and small businesses, a single phase, off-grid inverter should be fine. Off-grid simply means the inverter cannot supply electricity back to the national grid.
Some inverters come with WiFi monitoring, parallel functionality to mention a few. DYOR before buying.
Recommendations:
12v – No specific recommendations.
24v – Sako Sunon Pro 3.5kW, SRNE, Anern, SMK, Growatt etc
48v – Deye, Growatt, Alpsolarr, SRNE, Victron etc.
These brands are available through Fouani Nigeria, Gennex Technologies, Prosunenergy, HMsolar etc
Accessories – protective devices, wires, PV mounting racks, etc
‘Accessories’ may be a broad term but are grouped together for simplicity.
Protective devices: You will need AC & DC breakers, surge protection devices, and changeover switches etc., to avoid damage to your inverter, and other components. Their specsDefer to your installer or DYOR if you’re not familiar with which to get for your setup.
Check the resource section for breakdown of other installations to get an idea of what protective devices the users got.
Do not cheap out on protective devices. They may just be the last line of defense should there be overvoltage or other faults that could damage your entire system..
Wires: People often spend money on the other expensive components then choke it with thin, poor-quality wires. When buying, remember that thickness (mm2), distance and material (100% copper) are non-negotiable.
The farther the electricity has to travel, the more power lost to heat. To prevent this, use thicker cables for long runs. Also the connection between your inverter and battery carries the highest current so these cables must be very thick (usually 25mm2 to 50mm2) even if the distance is short.
Always check your inverter manual for specific cable thickness. I have linked the Victron Energy Wiring Guide in the resources for further reading.
Mounting racks: It’s bad to mount panels directly on the roof for reasons outlined in the solar panels section. Always use proper mounting accessories. There are standard roof mounting systems on Fouani.
Fire protection: Not often talked about but consider getting a fire extinguisher or fire extinguisher ball.
—-
That covers the four component groups. A few more things before the additional resources section.
—
Earthing
It is important to consider that your building is properly earthed as this goes a long way in protecting your setup. Get a professional who knows about earthing to test your earthing and improve it if necessary.
Choosing your installer
There’s a solar installation in my neighborhood that has over 30 panels placed directly on the client’s roof with all manner of shading issues. It’s easy to conclude the installer may not have been the best choice.
Not every electrician is skilled at solar installations, even when they claim so. Also, not every installer with fancy branding delivers quality work, and even that recommendation by your trusted friend/family should not replace your due diligence.
Solar components are already expensive, and putting them in the wrong hands is more expensive and often the genesis of ‘solar na scam’ stories.
Before committing, ask for previous completed jobs including videos or pictures. Ask questions about every line item on your quote that you don’t understand. Google or use YouTube if you have to.
There are still honest, skilled installers out there.
Installation cost reflect the scope and complexity of the job. For example, a 48v system for a 5 bedroom flat will cost more than a 24v system for a shop while a 16 panel installation three floors high on a slanted roof will definitely cost more than a 6-panel setup for a bungalow.
Should you buy your own components or outsource?
There’s no right or wrong answer here. Either option works as long as you understand the tradeoffs.
Your installer is likely more knowledgeable about quality, well-sized components and becomes responsible for any product failure when they handle procurement. They also handle logistics. It’s fair to expect some price markup for this service.
Buying components yourself gives you more control over quality, especially when buying from authorized distributors. On the flip side, you may end up buying fake or substandard components on the open market losing more money in the process.
Your installer bears less responsibility where there’s equipment failures and may not be obliged to provide specific support except previously agreed. You also have to consider the logistics stress involved, case in point: solar panels can get damaged in transit.
Do I need inverter ACs and freezers?
Where possible, prioritise energy efficient appliances. Inverter ACs are strongly recommended as they start up gradually unlike non-inverter ACs that kick-in with high surge and consume more energy overall.
For freezers, the technology has largely caught up that even non-inverter ones now self-regulate based on temperature. A standard non-inverter freezer can serve fine in a properly sized system.
Beyond ACs and freezer choices, check the power rating of all appliances you plan to run, prioritising the essentials depending on your solar system size.
What about Solar Generators?
Solar generators or power stations, as they’re often called, are all-in-one systems that come with a battery and inverter in a single unit. With the ability to charge via grid, generator or solar panels, they are generally more affordable than full solar inverter systems so can serve for very small setups.
The 1kWh variants are not recommended for whole house connection as some have an inverter output of 200w. This rating excludes all surge appliances and leaves you with light loads like laptop chargers, TV and rechargeable fans.
Even the higher variants like the 3.6kWh are better used by plugging specific appliances when needed than connecting to the whole house. But if you must connect to the whole house, be mindful of the load you place on it.
Solar generators are a decent stopgap before having a comprehensive solar setup.
How much will my solar cost and how long before I break even?
Solar installations are not cheap and the more appliances (including surge ones) you want to power and the longer you want to power them, the higher the cost.
For example, “can solar power my AC?” is a common question people ask. The honest answer is yes, but it will cost significantly more. A system designed to run one AC unit, especially during the night on battery, requires a larger battery bank, more panels and a higher-rated inverter than a system without one.
Expect to spend at least 2 million naira on any decent setup that can carry a freezer for starters.
Component prices also shift frequently so always compare prices from vendors or installers before committing. If the price is too good to be true, it probably is.
On breakeven, As well as grid cost, remember to add cost of generator fuel and repairs. Most people don’t add these and you would be amazed how they add up to your calculation.
That being said, breakeven calculations often leave out something important – lifestyle. There’s no spreadsheet that captures what it means to work from home, prepare meals days ahead and spend a Sunday evening with the family without one eye on PHCN.
These are real life improvements that do not show up in a payback calculation but are felt every single day.
—
This post barely scratches the surface of solar energy but I hope it gives you a clearer picture of where to start. There’s a growing community of solar enthusiasts in Nigeria across different WhatsApp and Telegram groups, Nairaland and X and much of the knowledge in this post was shaped by them.
The additional resources section below includes videos and articles that go deeper on system sizing, wire gauges, solar panel best practices, and DIY installation breakdowns with full material lists and schematics.
Looking for a trusted solar installer?
We are building a network of pre-vetted solar installers. If you would like an installer to come for a comprehensive system sizing, fill out this form. This is currently available in Lagos and Port Harcourt only. Consultation fees apply.
Additional resources
Solar system sizing calculator
Blog posts
Of a budget Solar Inverter System – Energy Audit
Of a budget Solar Inverter System – Solar Panels
Building an Off-grid Solar System – My Approach.
Renewable Energy Rabbit Hole I and Part II
Wiring Unlimited/DC wiring – Victron Energy
Videos
Electricity Explained: Volts, Amps, Watts, Fuse Sizing, Wire Gauge, AC/DC, Solar Power and more!
How to Size a Solar Power System for Your Home (DIY)